DIY Painted Wine Glasses
**Update: I originally wrote about these DIY Painted Wine Glasses way back in 2013. If you came here from Pinterest, you’re in the right place! I just updated the pictures a bit and made a video – go check it out!**
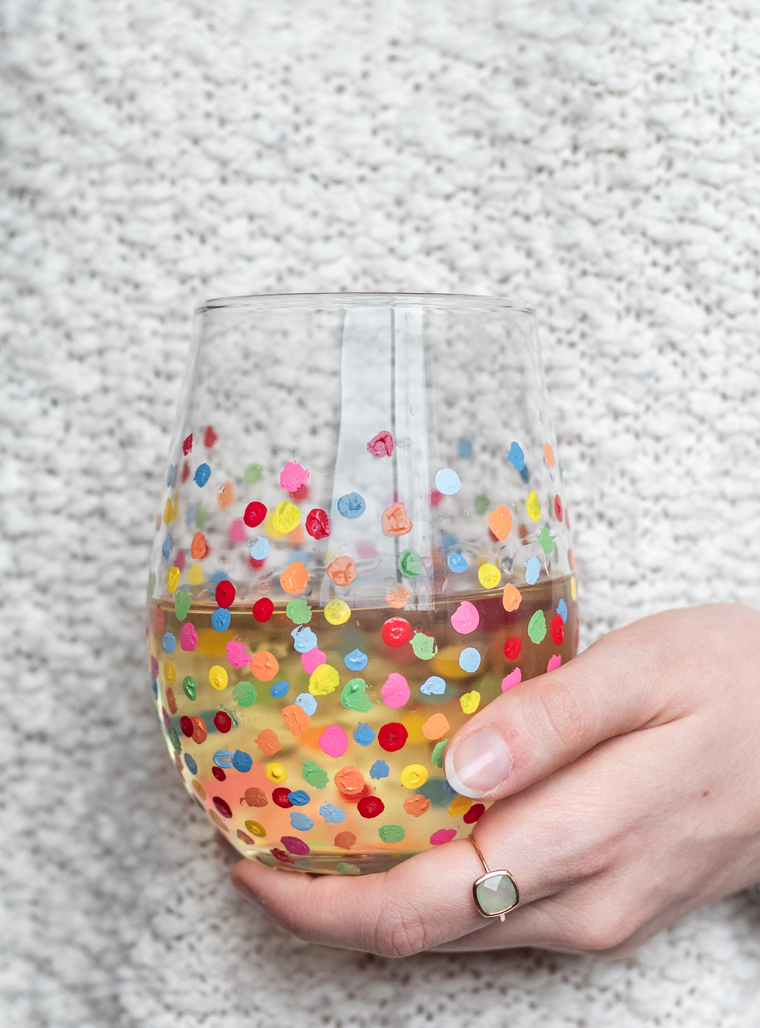
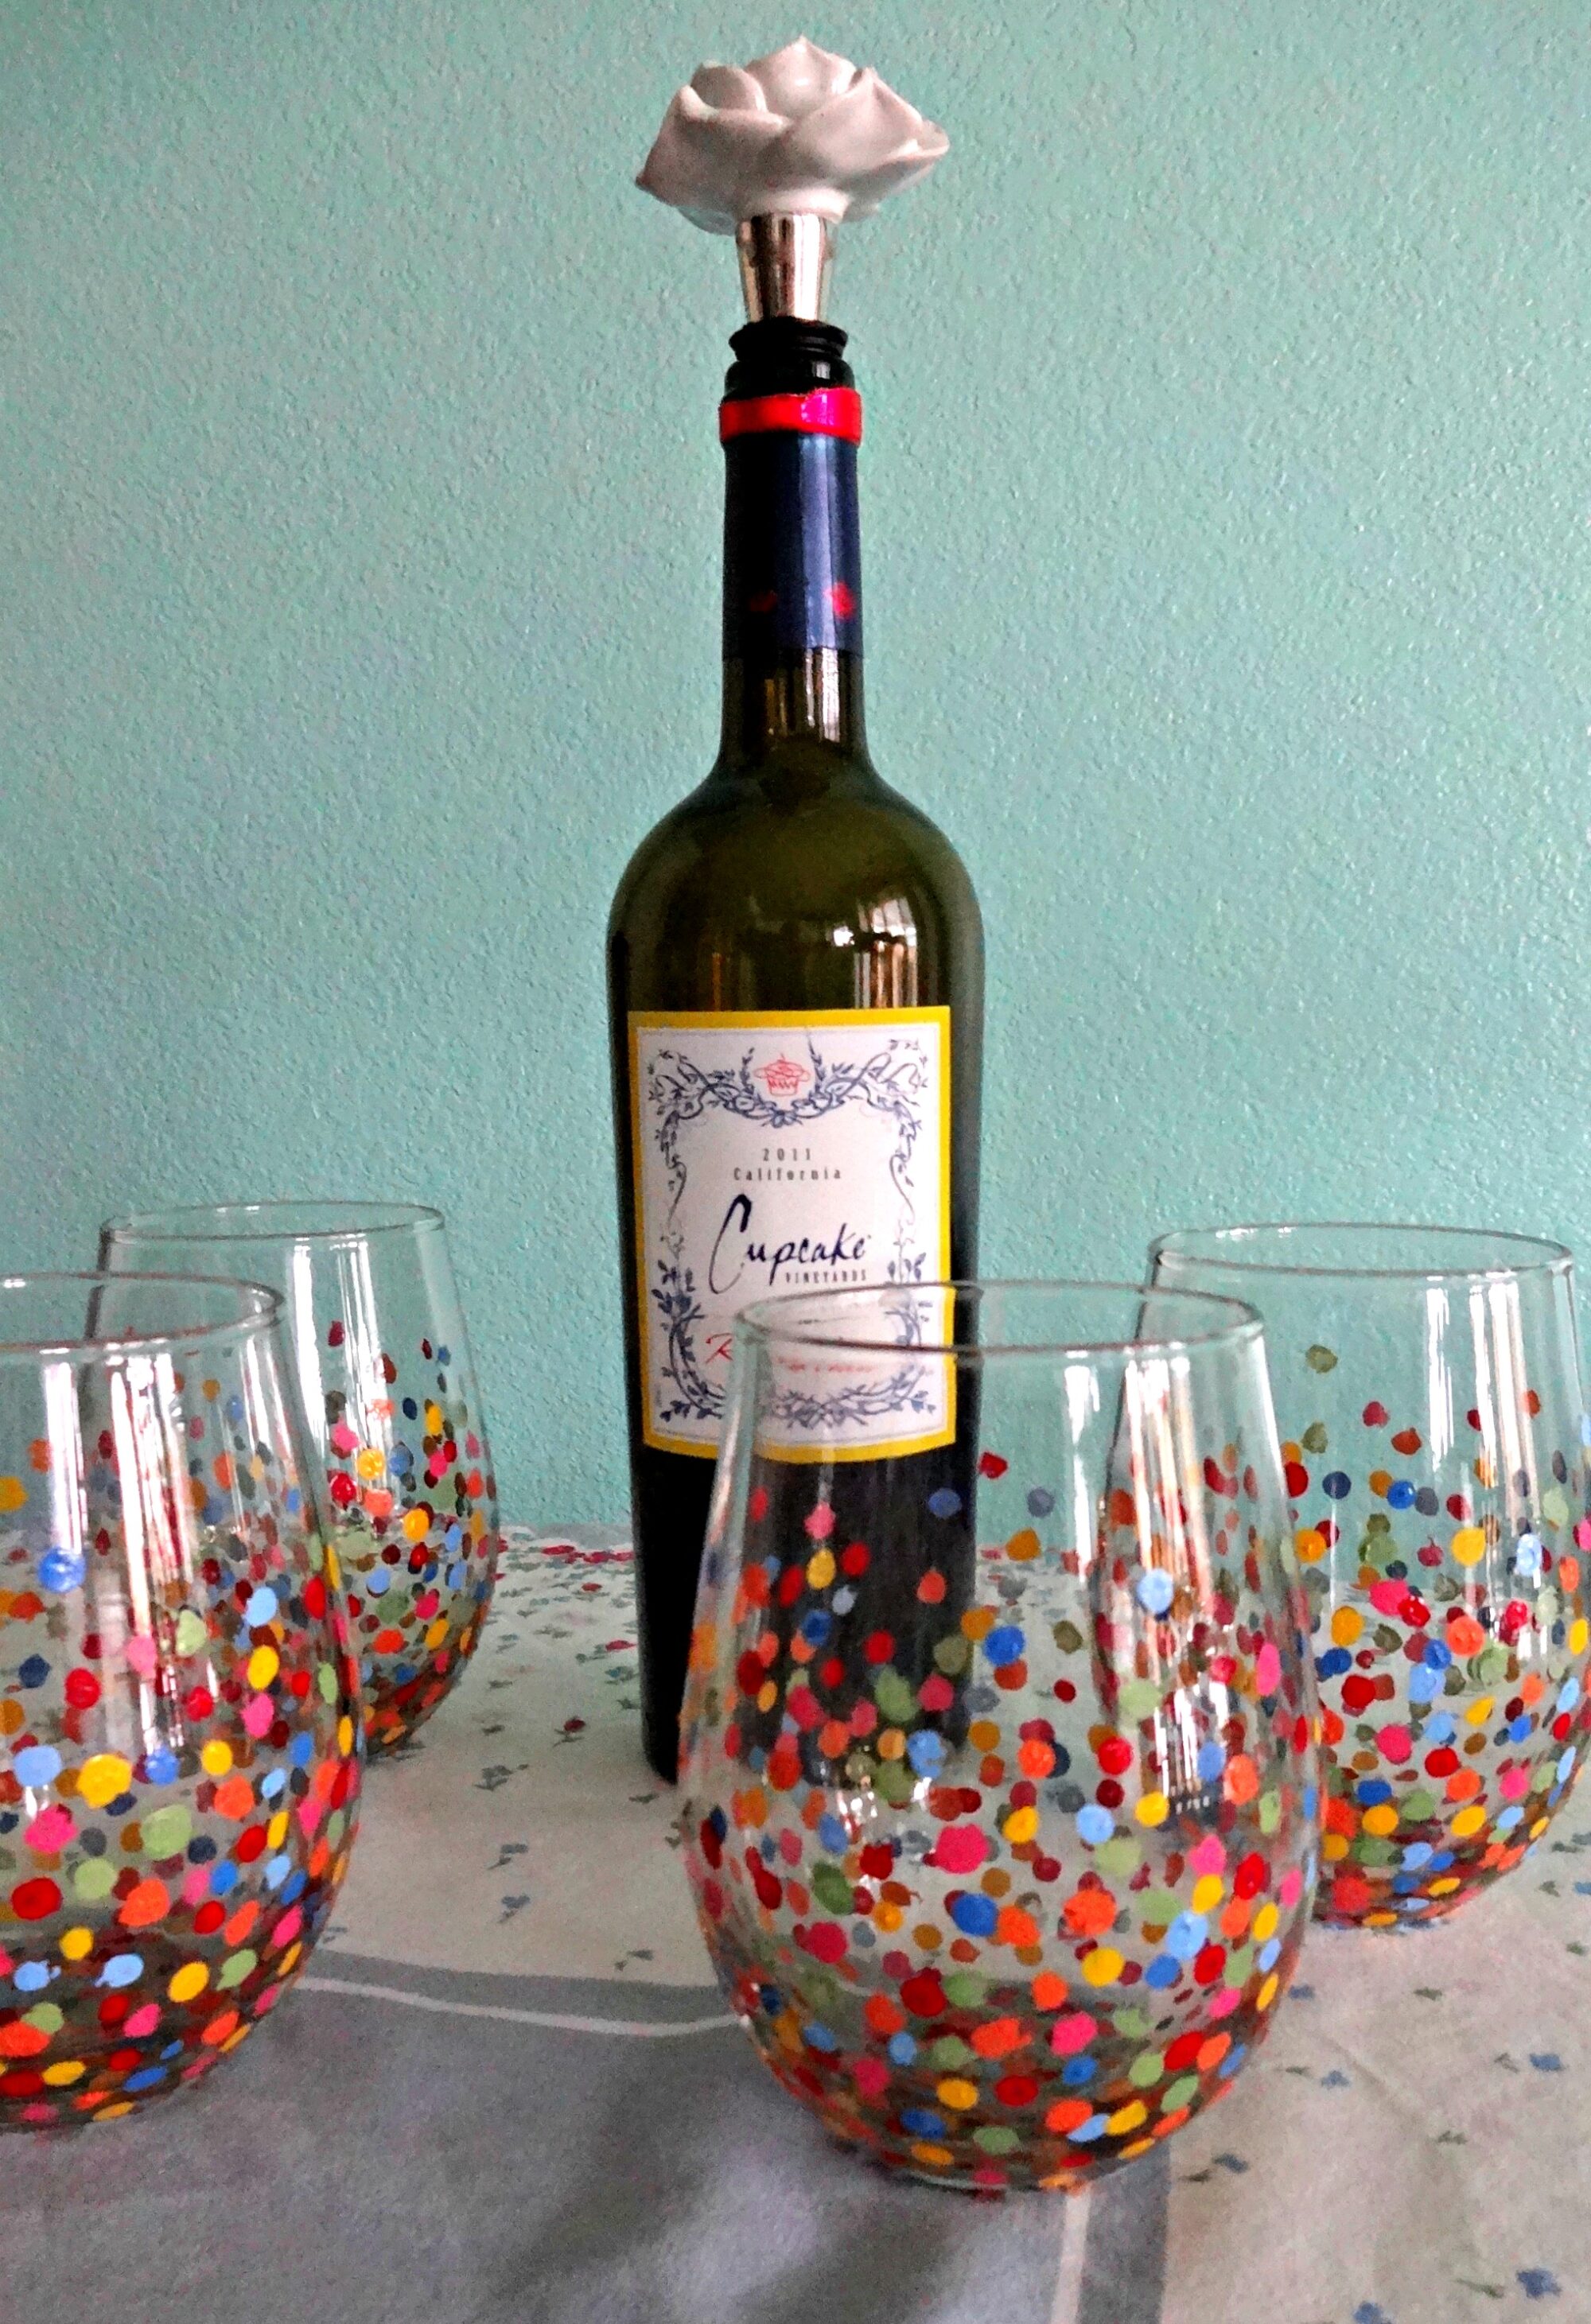
Back in 2013, when I was a freshman in college (omg so long ago), I was poor. I know, shocking right?? Needless to say, my part-time job at the daycare was not rolling in the cash. To save some money on Christmas presents, I decided to DIY wherever I could. However, I have a strict policy when it comes to DIY: it can’t be cheesy. I started scouring the internet for ideas and eventually came across a picture of some rainbow-y, dotted drinking glasses. Honestly, I looked everywhere for a tutorial, but there was none to be found. I remember spending countless hours researching how to paint glass. Eventually, I came across a painting tutorial for something entirely different (I can’t even recall what it was anymore) and decided to try it on glass anyways. And, it worked! So I posted it, pinned it, and thought nothing of it.
And uhhh, it took off? Like, I get thousands of views on this post every month. If you look up “DIY Painted Wine Glasses” on Pinterest, my old images are sure to come up. This was before I knew what optimized pins, SEO, and alt-text meant. This was literally before I knew what a DSLR is. The original pictures were tiny thumbnails, kinda blurry, at awful angles. And people just kept clicking anyways. It still blows my mind. The good old days of blogging, amirite?
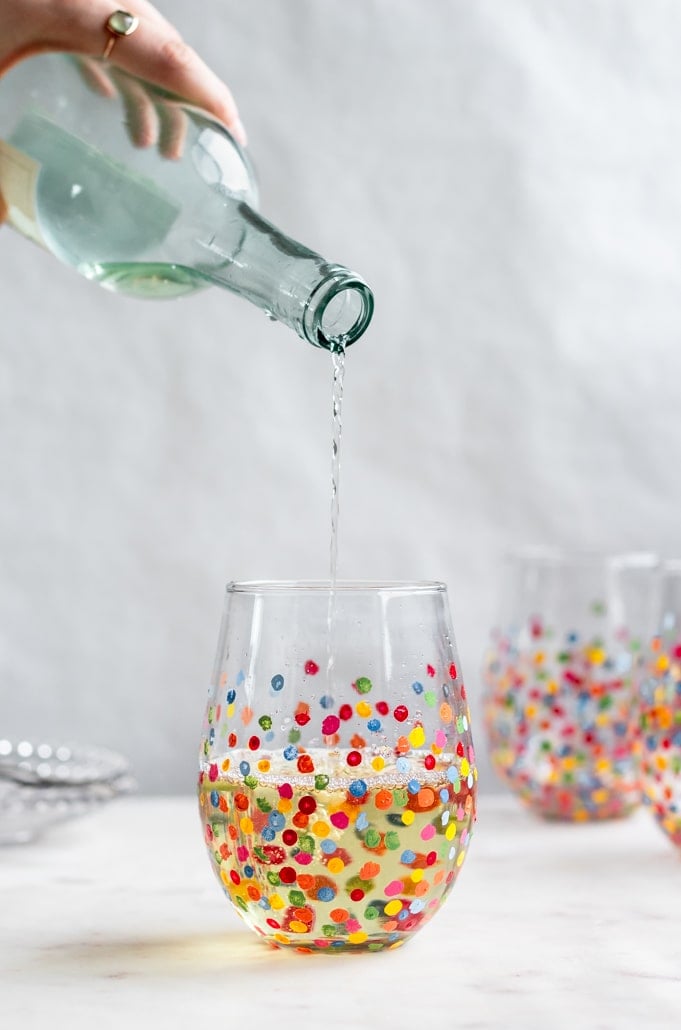
But, my work has come a long way since 2013, so I decided to update my DIY Painted Wine Glasses post and also make a video, because I’m meta like that. AND GUESS WHAT GUYS. Craft stores have like, a bajillion times more glass paint options than they did in 2013! Back then, you only got like, 10 color options. Now, there are tons. There’s metallics and sparkles and shades galore. It’s amazing. However, I still recommend the Martha Stewart or another high-quality brand. Otherwise, it might just chip off. (Side note on this: those rainbow glasses are the same ones that I made in 2013! They totally held up).
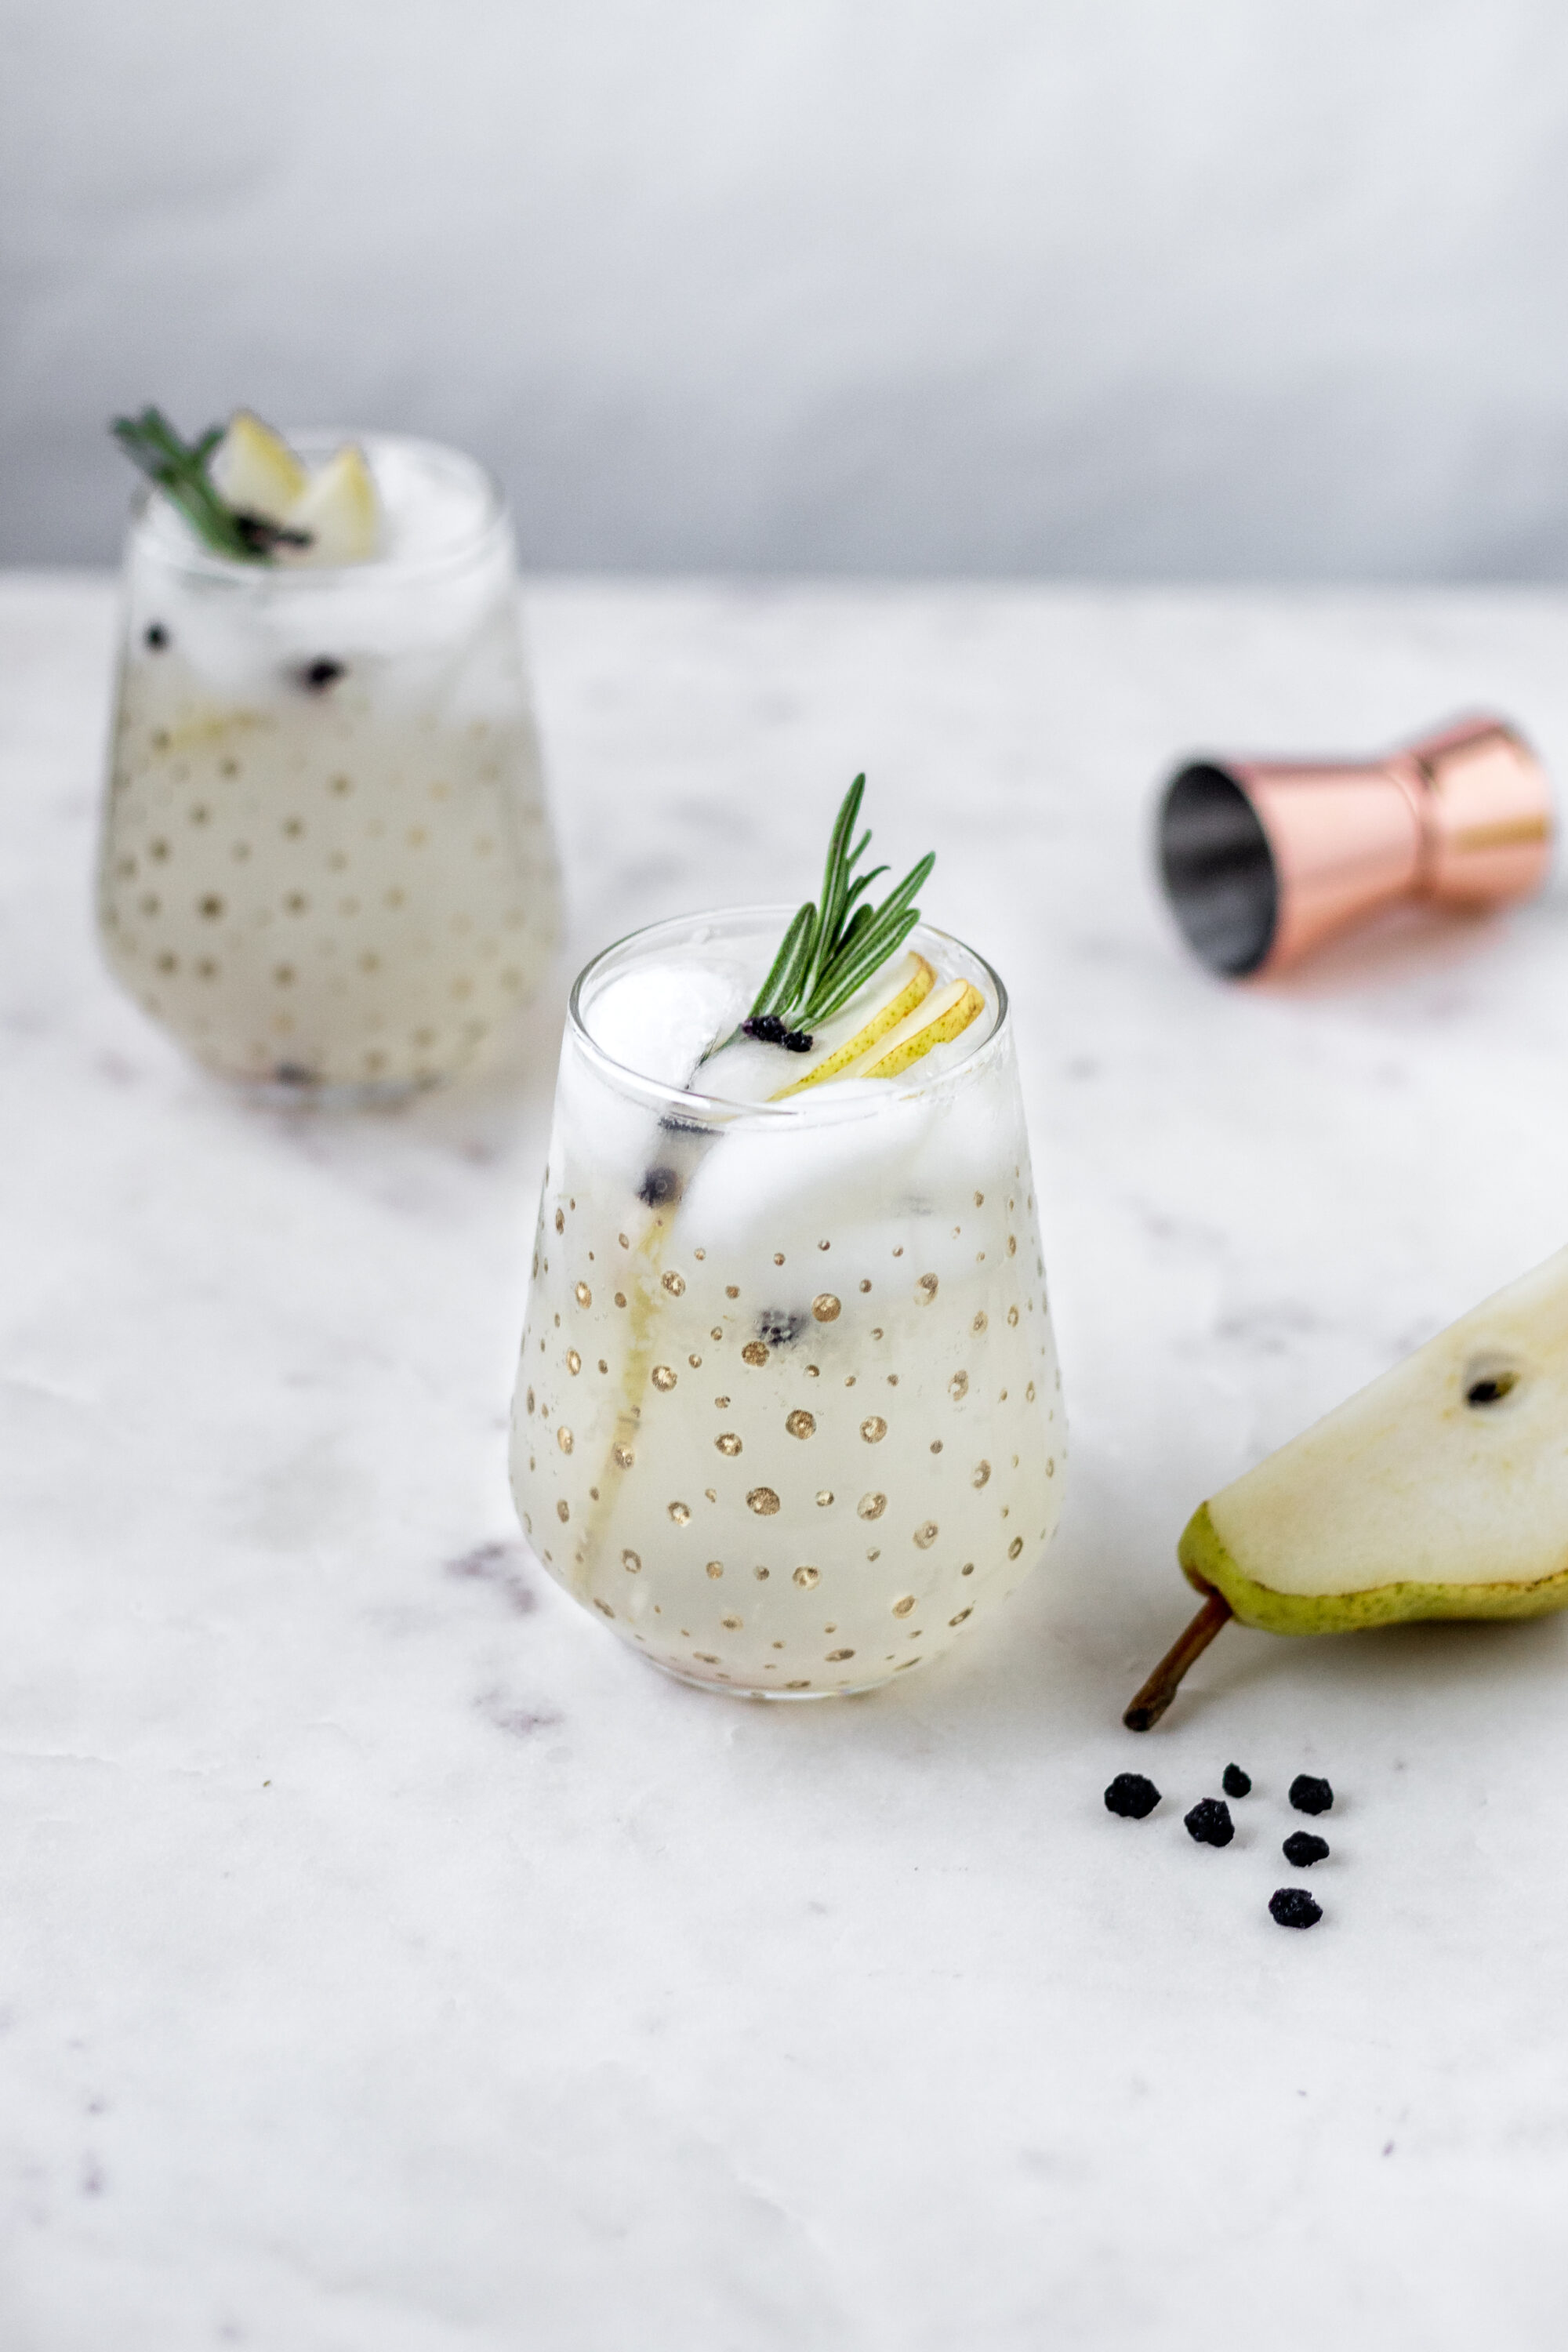
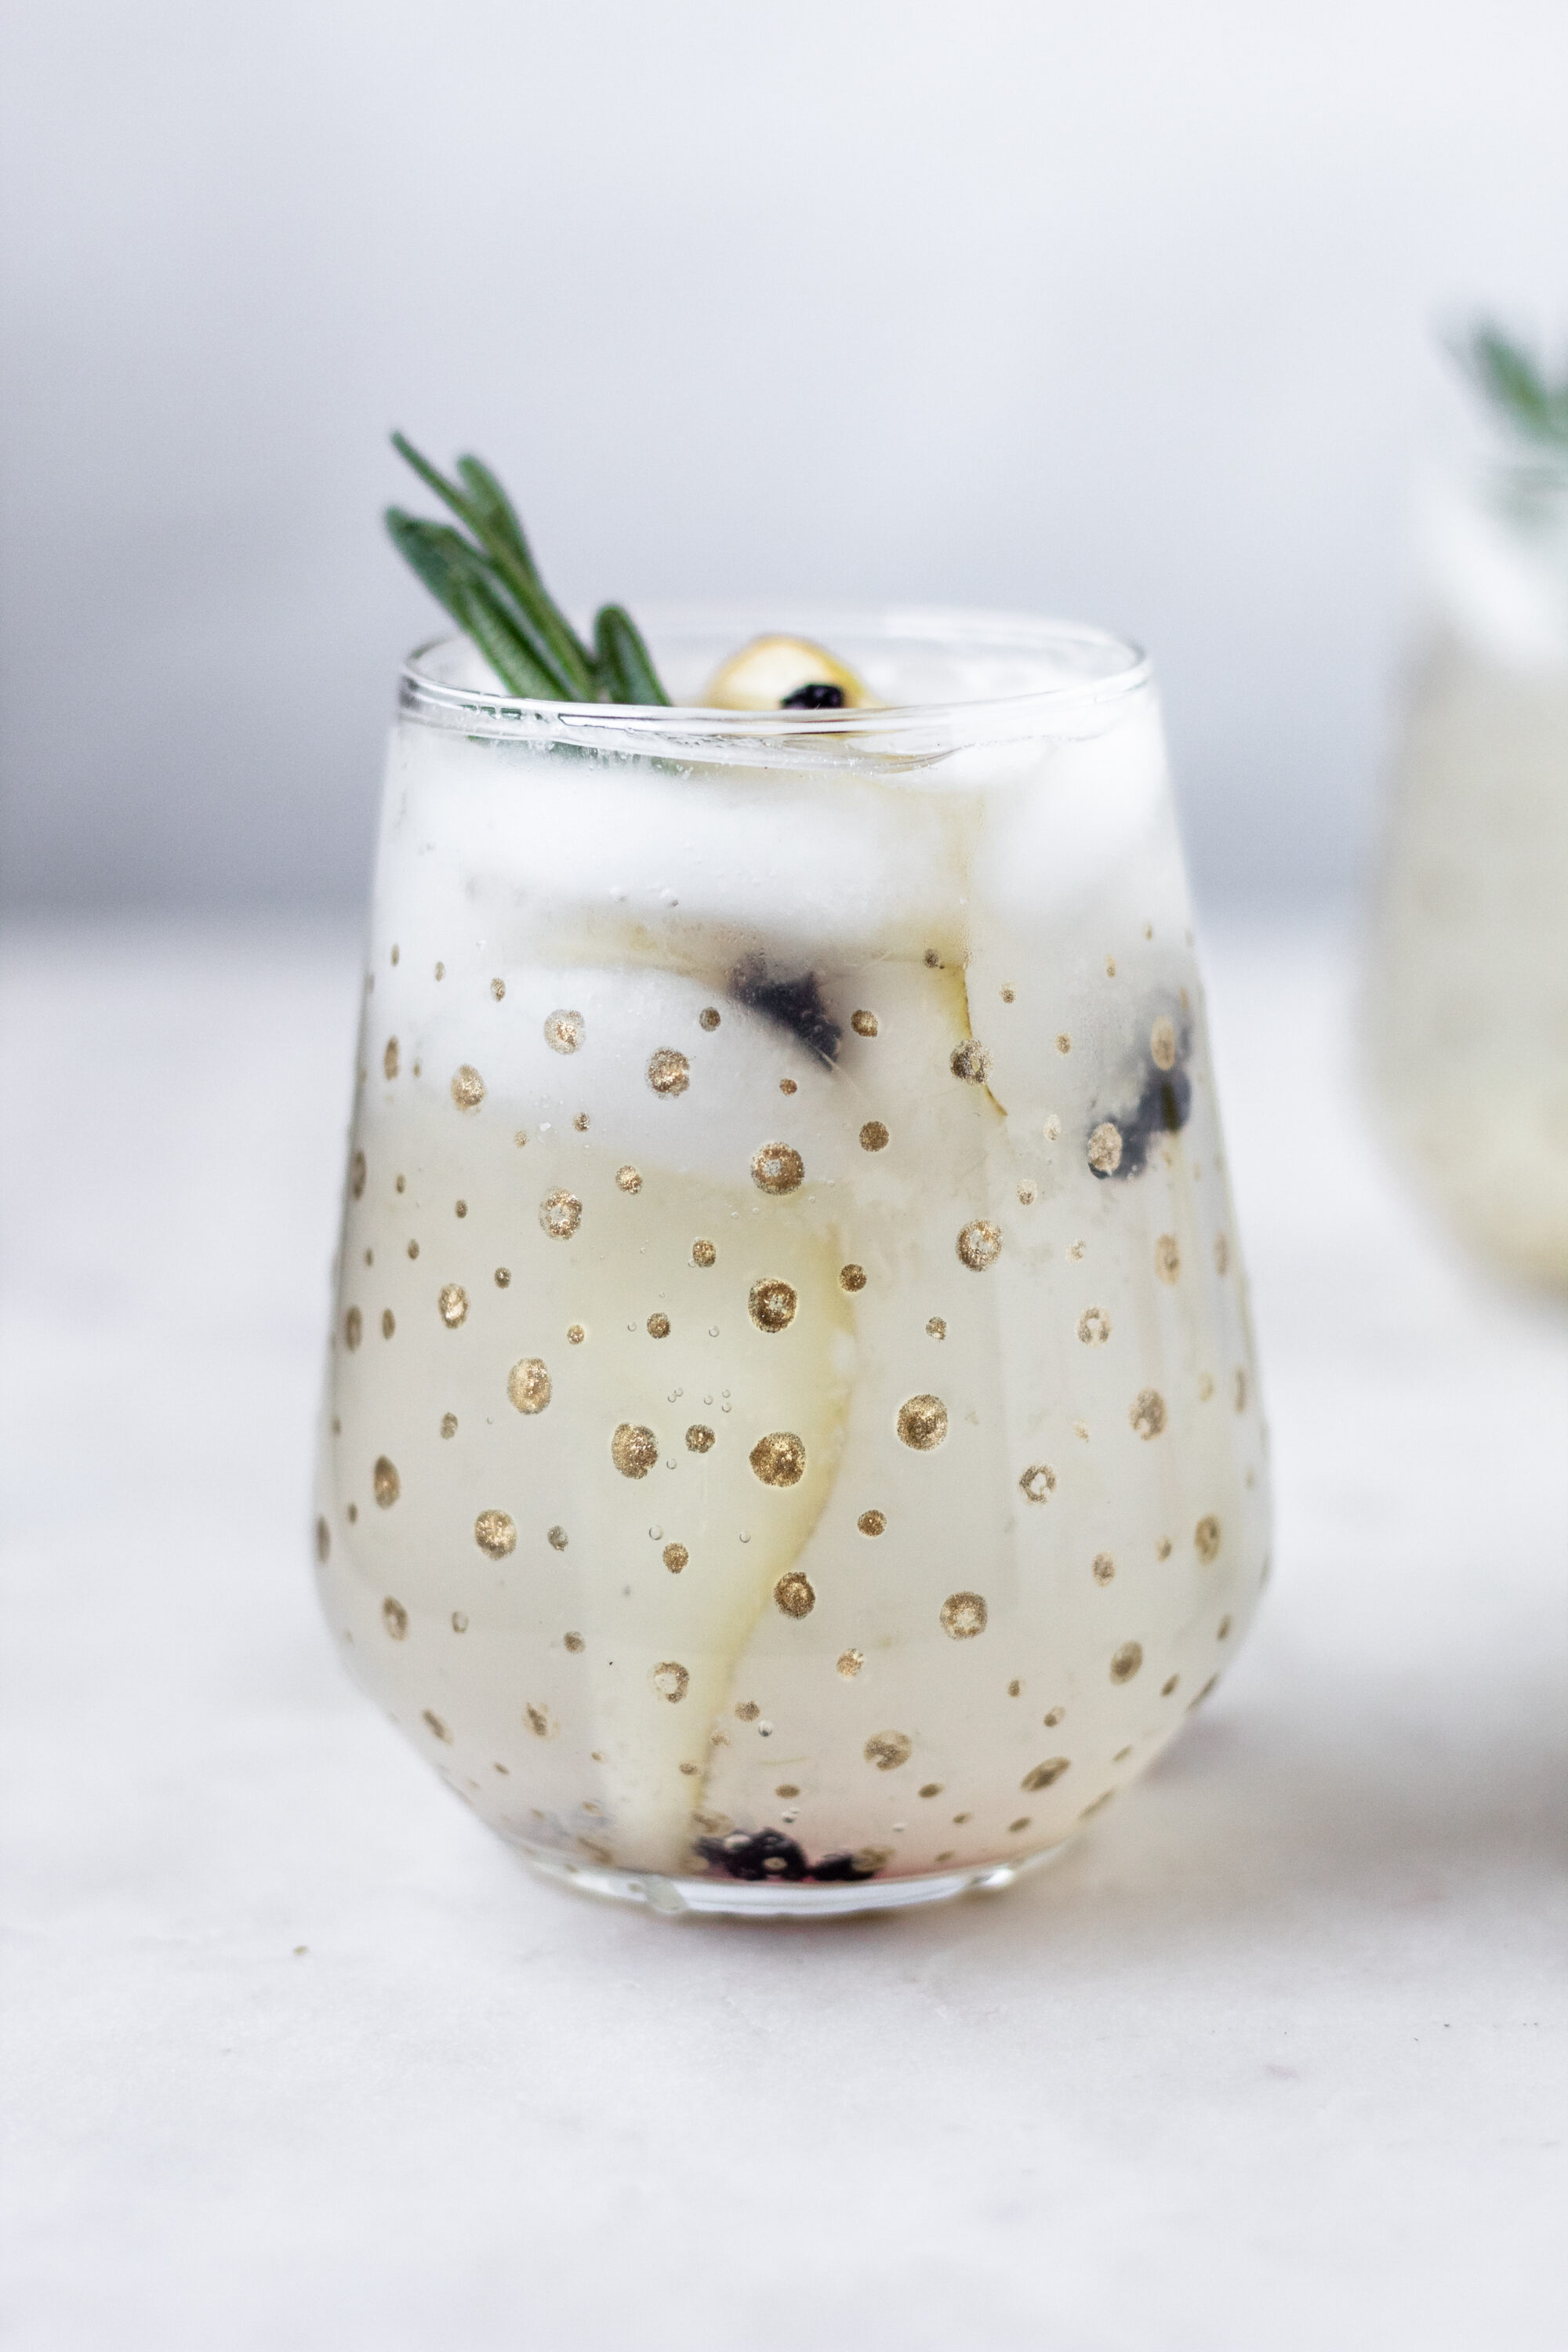
ALSO, because this is a food blog after all, I added a fun little cocktail recipe at the end. It’s a super easy Pear Gin Spritz that has the perfect flavors for all the Christmas parties! It’s sososo good. I’d highly recommend making this cocktail even if you never get around to painting glasses. Or, you can make my Pomegranate Brown Derby which is also perfect for Christmas 😛
Lastly! The video is posted below, but if you are old school, or want to print the directions, I included the written step-by-step below. Ok, I think that’s it?? If you make these, make sure to tag me on Insta with @serendipitybysaralynn and #serendipitybysaralynn.
DIY Painted Wine Glasses
You will need…
- Drinking glasses of choice
- Rubbing alcohol
- Q-tips, lollipop sticks, toothpicks, paintbrushes, etc.
- High-quality glass paint (it’s important that it’s made for glass – I like the Martha Stewart brand)
-First, wipe down your glasses with a clean cloth and the rubbing alcohol. Make sure to clean them really well, or any dust/dirt will chip off the paint.
-Next, it’s time to paint. You can buy as many colors as you want or mix colors together. Using Q-tips or lollipop sticks, dot the paint all over the wine glasses. Start at the bottom of the glasses, and work your way down the sides. Add as many or as little dots as you’d like.
-Continue painting the dots until you’re happy with how it looks. If you’d like, use a toothpick to paint smaller dots in the empty spaces.
-**Now this step is v important**. Place your glasses on a baking sheet. Next, place the baking sheet with the glasses in a COLD oven. Turn the oven to 350* F. When it’s preheated, set a timer for 30 minutes.
-After 30 minutes, turn off the oven. DO NOT OPEN THE OVEN! If the cold air gets in there, the glasses could explode. Let the glasses cool completely (preferably overnight). Then, remove them from the oven.
-Lastly, let the glasses cure for at least three days. Wash, and voila! Beautiful, handpainted glasses for your loved ones <3
And, of course, here’s the perfect winter cocktail to serve in your beautiful new glasses 😉
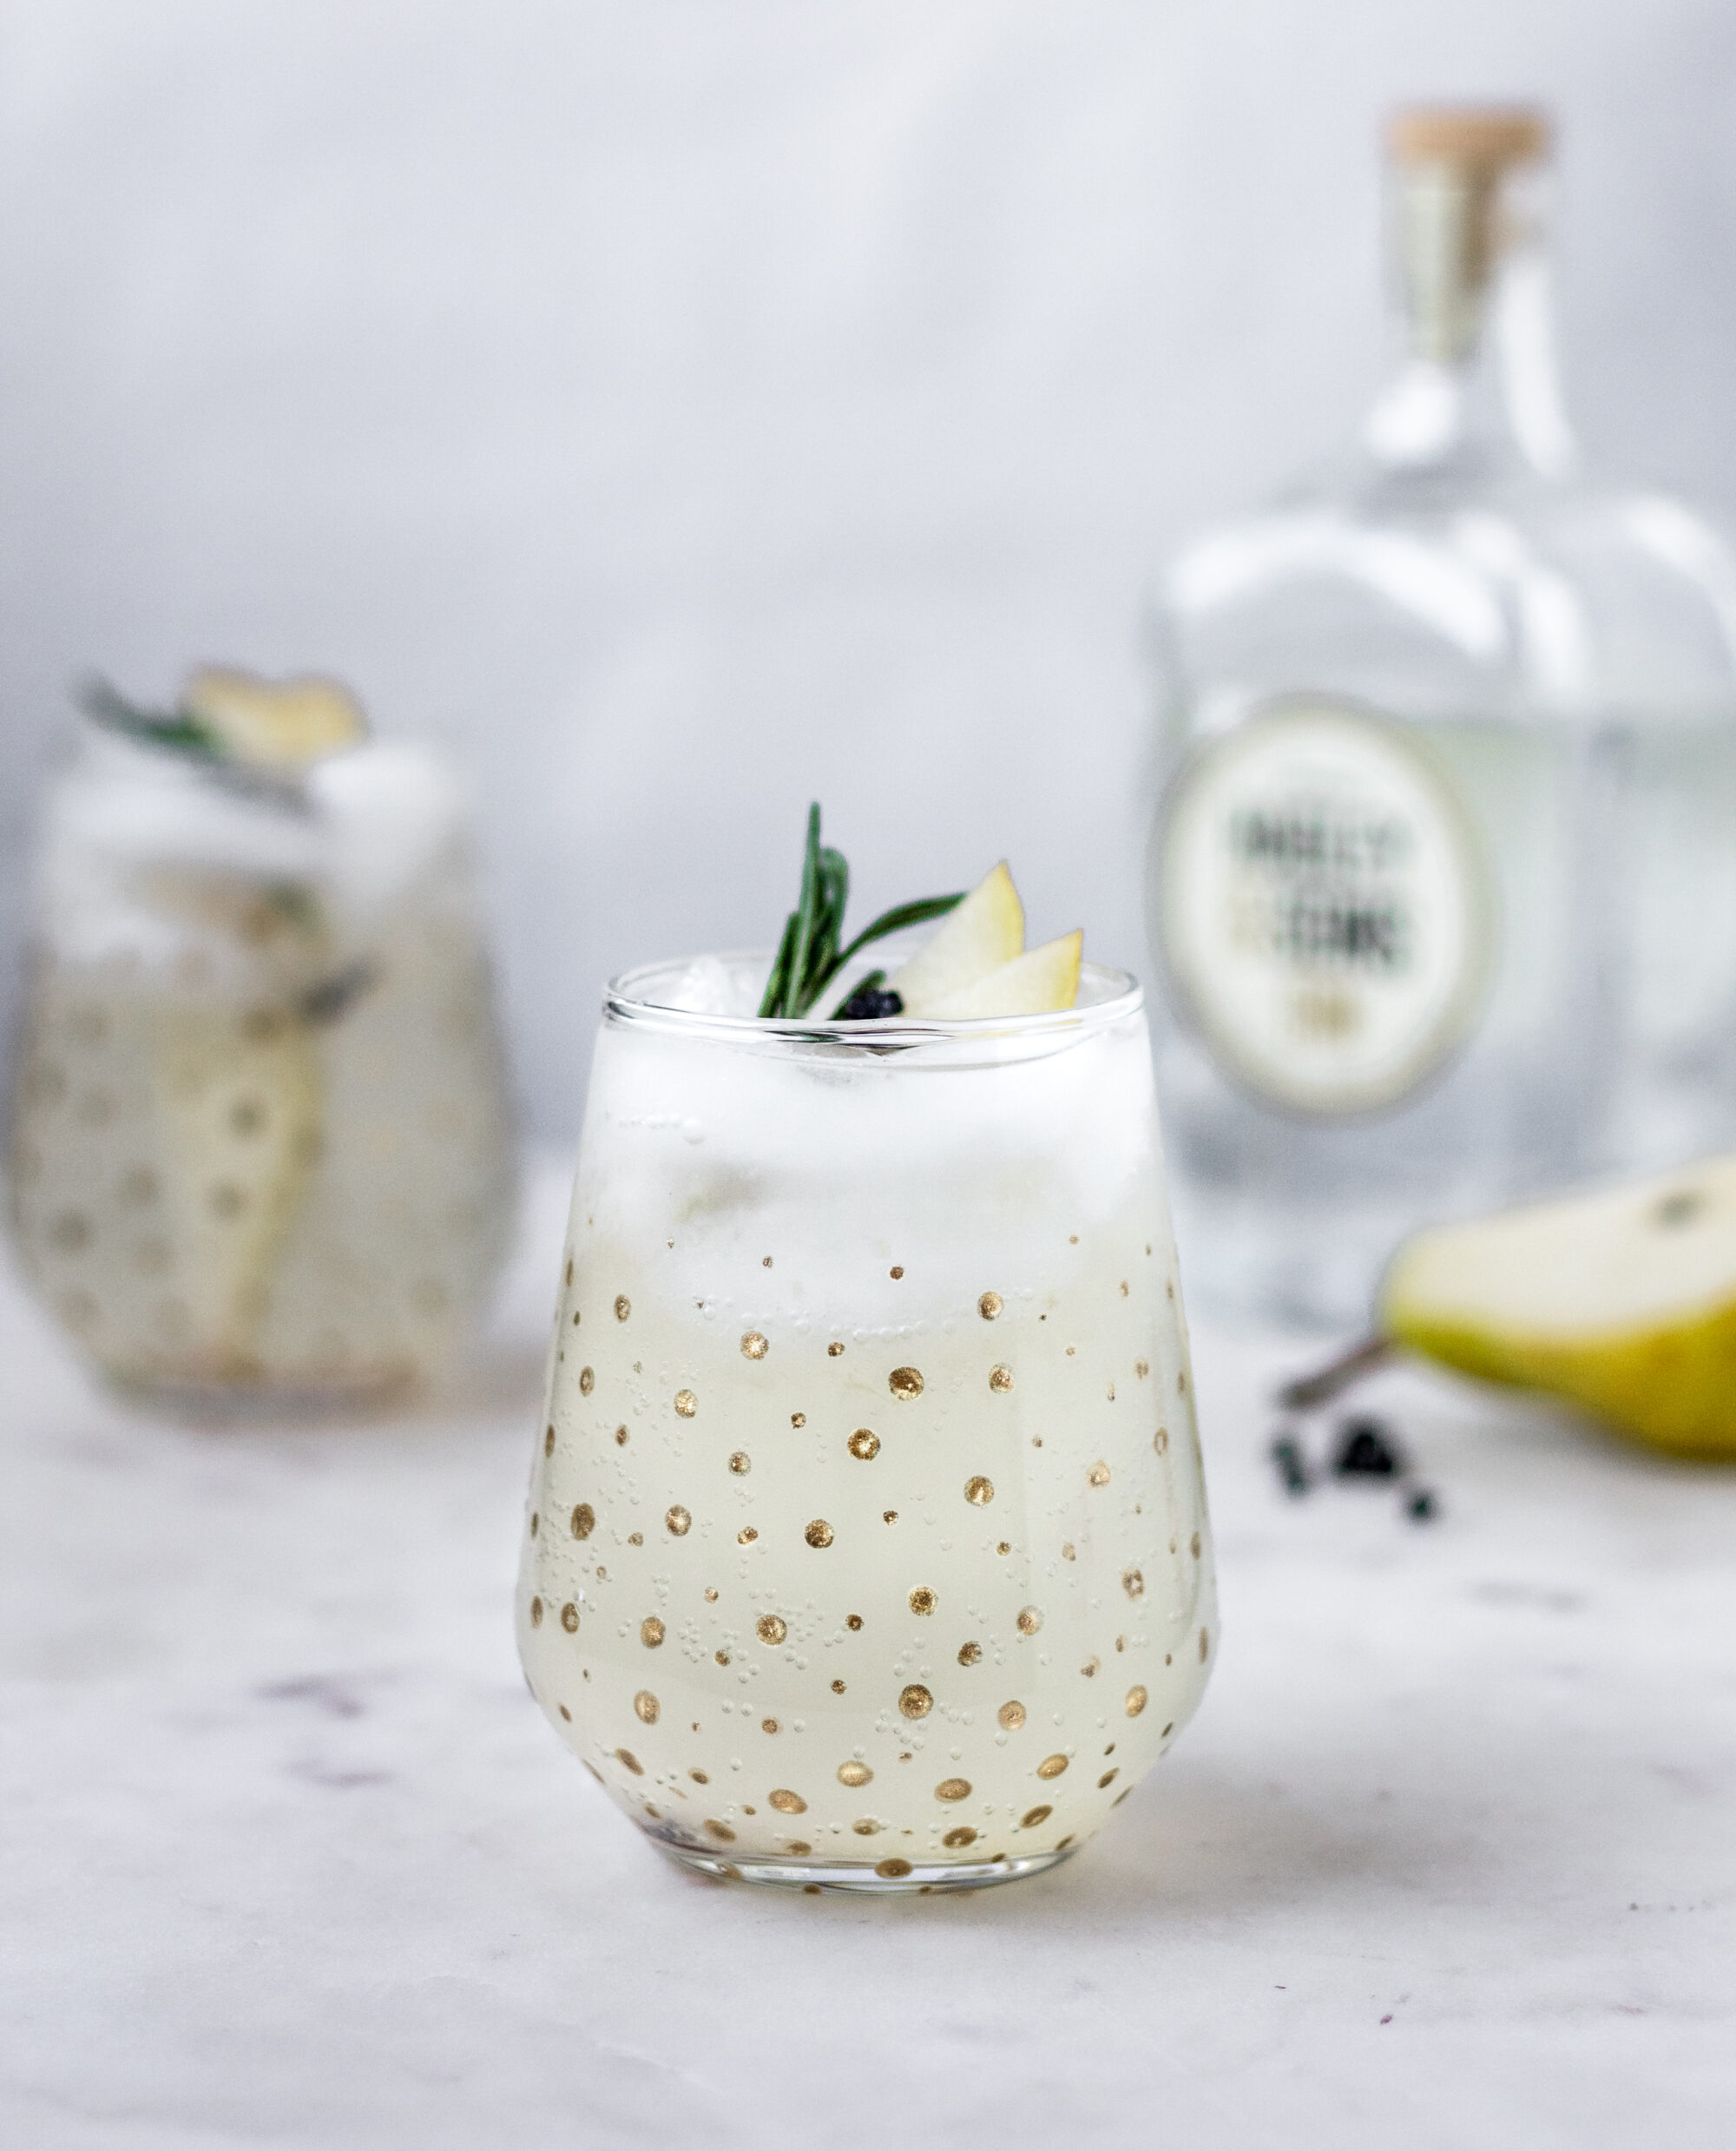
Pear Gin Spritz
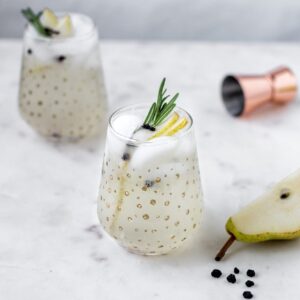
Pear Gin Spritz
Ingredients
- A few chunks of pear
- 1/2 tsp honey syrup (or simple syrup)
- 1 shot gin
- Dry sparkling wine/prosecco/champagne, or sparkling water
- A few rosemary sprigs
Instructions
- In a cocktail shaker, muddle the pear with the honey syrup or simple syrup. Add the gin and a few cubes of ice. Shake until the outside of the cocktail shaker is frosty. Strain into a cocktail glass. Top with a splash of dry wine or sparkling water. Slap a sprig of rosemary to release the oils. Garnish the cocktail with the rosemary. Serve.
Notes
xo Sara Lynn
*Song of the day: Santa Baby by Eartha Kitt
P.S. Here’s a little throwback pic if you like feeling nostalgic 😉

awesome
Thank you!
Will it be safe to wash them in a dish washer or by hand only?
Hi Kristen! After the paint is cured, it is dishwasher safe, if used on the top rack of a standard dishwasher. As long as your glasses are dishwasher safe, the paint should be fine!
XO Sara
does it matter if the glasss sit up or face down when in the oven?
Nope! I just put them face down because they’re easier to balance that way 🙂
Where did you get the paint from?
You can get the paint at Michael’s!
These are absolutely beautiful! Thank you for sharing!!
Thank you for checking them out! Xo.
They can air cure?
Yes, for 21 days!
Made these last night and they are super cute! Great idea! I’m keeping these for myself, but I might make more for Christmas gifts!
I’m so glad they turned out! They make great gifts. Everyone loves them! Thanks for letting me know how they turned out! Xo.
can you use acrylic paint?
I have never actually tried, but I think the paint would eventually peel off since it does not stick well to glass. I also cannot guarantee that it is safe to use on dishes that will be used for food/drink. I hope that answers your question! Xo Sara
Which type of Martha Stewart glass paint did you use…transparent or opaque?
Thanks!
I actually used opaque! I’m sorry about the mishap! They would look great transparent too though.
Why do they need to be put in the oven? Does this seal on the paint or??? Thanks!
Yes, it cures the paint which keeps it from chipping!
I have looked several times at my Michaels and the only Martha Stewart paint that is sold is “Multi-Surface High Gloss Acrylic Craft Paint”. (there are other varieties, brands etc., but nothing that is ONLY called “glass paint”. I noticed in one comment above that you suggest NOT using acrylic paint since it may peel off?? Did I understand that correctly? I went ahead and bought the paint since it specifically says ‘mulit-surface, including glass, etc.’.
Thanks!
Hi Bonnie, the stuff I use is specifically called Martha Stewart glass paint. I cannot guarantee it will work since it is acrylic, but if it says it works on glass then it may work! I’m sure you could buy glass paint online!
I just looked at the description online and it says the paint is dishwasher-safe on glass so I assume you could use it? If you want to guarantee it though, this is what you’re looking for: http://www.michaels.com/martha-stewart-crafts-glass-paint-gloss-opaque/M10240637.html
Thank you for the reply!! I am going to try one more time back at Michaels (or Hobby Lobby). Again, thanks for the help! 🙂
Of course! I hope you find some! They also might have some at Joann’s. You could always call before and ask 🙂
This looks awesome! Does it matter how many glasses you bake at a time? Can I use the same temp and time for 6 glasses at once?
Thanks! As far as I’m concerned, you can bake as many as you want at once!
Can’t wait to make these! I bought all the stuff….do I just paint the outside of the wine glasses or the inside also? Thanks in advance!
Hi Megan! Don’t paint the inside and leave about an inch at the top unpainted 🙂 The paint is safe to use on glasses, but it’s recommended that it does not actually come into contact with food or drinks! Hope this helps.
Did it mess up the paint on the bottom of the glass when you set it on the cookie sheet? Or did you place them upside down?
I painted the bottoms last and placed them upside down on the cookie sheet to bake them 🙂
i just made these in my wedding colors! I’m going to use them as my “will you be my bridesmaid?” gift along with a bottle of wine. So excited to see the look on my bridesmaids faces when they get them!
Amazing! I love that idea. So glad they turned out. XO.
Hey there! What do you mean by a “cold oven”? I know that sounds sort of dumb! But I’m just confused on the oven “baking” part of it all!!
Hi Emily! Not dumb at all! You’re just going to set your baking sheet of glasses in the oven before you turn the oven on to 350*. After they’re done baking, you will turn off the oven and let it cool all the way down before taking the glasses out. Heat can make glass explode so you have to place and remove the glass while the oven is not hot!
I know this is from awhile ago, but I had a question. I’m looking to make these with friends and we were hoping to paint them, let them air dry for an hour enough to handle and then take home to bake on our own? Do you know if they would be dry enough after an hour to handle and the paint wouldn’t smear? Thanks!
Hi Emily! If you are doing dots, they generally dry within 15-30 minutes. If you’re doing designs or larger areas of paint, they might take a little longer to dry, but I’m sure they’d be fine after an hour!
Did you put the glasses directly on the baking sheet? Did you use like a cookie sheet or something?
Hi Erica,
I place mine upside down on a cookie sheet 🙂
My daughter saw these and asked me to make them for her. She is going to get them for Christmas. That’s if they don’t explode. Ha. Question. I made something else with dots on and the paint ran when in oven. Anyone have that kind of trouble. Thanks for this project
Hi Faith, I’ve never had problems like that! Try to use the glass paint (I use Martha Stewart’s brand from Michael’s, but I’m sure there are other options). Regular craft paint would probably run, but the glass paint works perfectly! Hope this helps 🙂
Thank you deco art Americana gloss enamel
Hi I hope you still check these messages! Beautiful glasses! I’m curious to why they can’t be used for 72 hrs after baking? I didn’t notice that detail untill it was to late, mine are in the oven now to be used for a themed bridal shower on Saturday Evening (today is Thursday) will they be ok to use?!
Hi Krista, so sorry I’m just getting to this! Somehow it ended up in my spam folder. I’m not totally positive why they can’t be used for 72 hours (that’s what the paint bottle said – I imagine it’s so it doesn’t come off if you wash them). However, I have made them for friends who used them within 72 hours, and they were fine. Hope the bridal shower was lovely! xx.
Thank you for this idea. The past few years I’ve been trying to do more handmade items for Christmas gifts. I saw your original post a couple weeks ago and it is what I’m doing for all gifts this year. First ones having been giving and the 2nd half are in the oven now. The friends who received them yesterday loved them.
Yay, I’m so glad they turned out, Ginger! The rainbow glasses in the photos are five years old, and they still look brand new! Merry Christmas xx.
This is awesome! The decorating possibilities are endless. Found this really Helpful!!!
thank you, danette! they are so fun to make!
You mentioned after baking it needs to cure. When you say cure for 3 days and then I saw you answered someone that you can air cure it for 21 days what do you mean by curing for 3 days or air curing for 21 days?
Hey Rebecca! You can either bake it and let it cure for 3 days, or you can skip the baking and let it air cure for 21 days. However, this will depend on the paint you use (there should be instructions on whichever paint you buy).
Also, it doesn’t seem that Martha Stewart glass paint is sold anymore. I saw someone said the deco art glass paint ran. Do you have a suggestion?
Hi Rebecca, I have not made this project in a few years, so I haven’t tested other paint. I saw in this blog post that Plaid FolkArt Enamel is a good option!